Prototyping Mobile Animations with Pixate
Kate Studwell, Former Project Manager
Article Category:
Posted on
As a project manager here at Viget, one of my responsibilities is making sure my team is actually available to work on a project. We have a great internal process for planning resources, but it can be challenging to reserve team time for internal projects that we launch via Pointless Corp. when we've got so much awesome client work going on. During these busy times, we sometimes have to get creative and figure out ways to make progress even if the ideal team member isn't available. This happened recently on a mobile web app we're building internally; our front-end development team was all booked, but we wanted to start building out some fun animations that are integral to the app.
It was perfect timing that Justin Belcher came to the Viget office to demo Pixate, a web-based mobile animation prototyping tool, which allows you to preview animations in a native mobile app. The tool, currently in beta stage, is intended for designers, but the interface was intuitive enough for me to create a quick prototype that would help us nail down exactly what we were going for.
All I needed to get started was a few images, which Senior Designer Mindy Wagner kindly provided me, and I was off to the races (after taking an hour or two to get used to the tool). While I can’t share the internal app we're building, here’s a quick rundown of some of the exciting things I was able do in Pixate using Pointless Corp. images instead.
Overview
Pixate allows users to create "screens," which live within projects. The screen view is where most of the editing happens, and the slick interface looks somewhat similar to other photo editing tools I've used in the past:
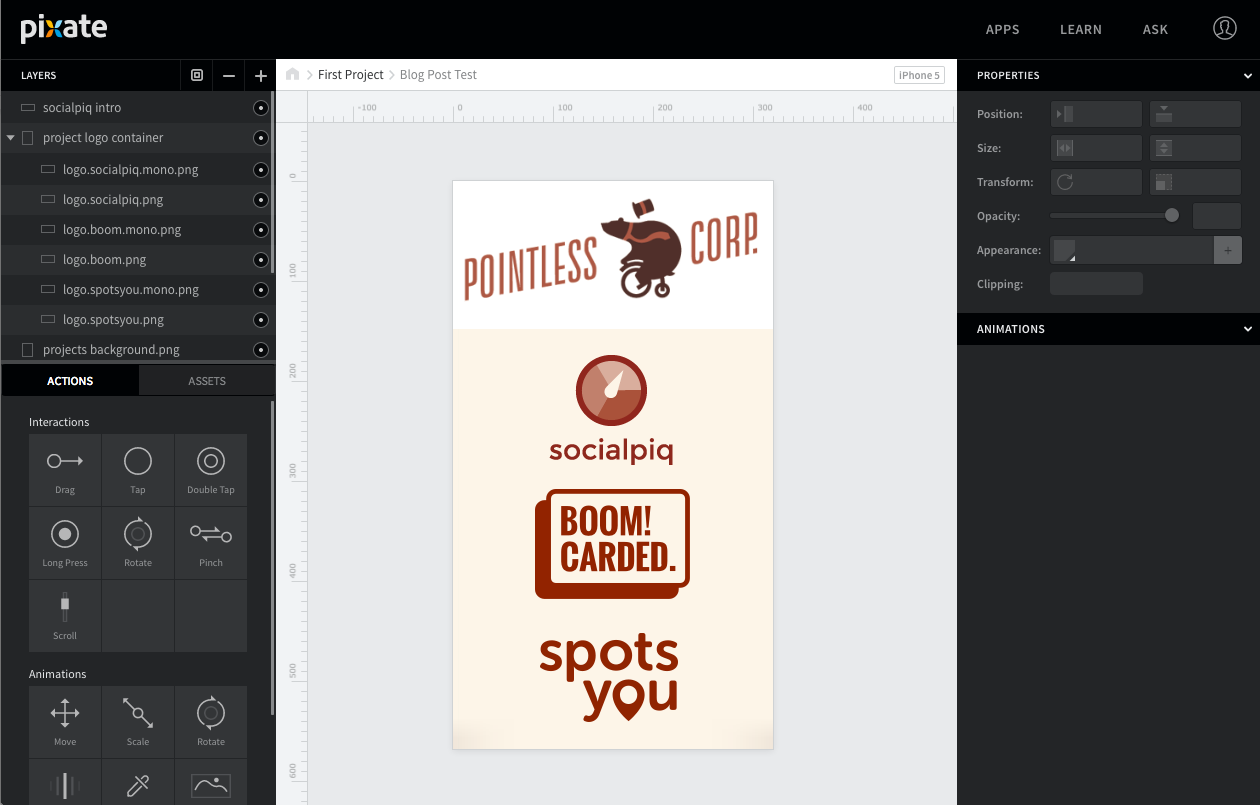
On the left side of the page, you can create layers and see the available interactions and animations that can be added to the screen. On the right side of the interface, you can specify details for each of the layers, such as size, position, opacity, and add specifics and conditions to animations and interactions. And, of course, in the center is the canvas that represents the page you're building.
Let's dive into some of the details!
Interactions vs. Animations
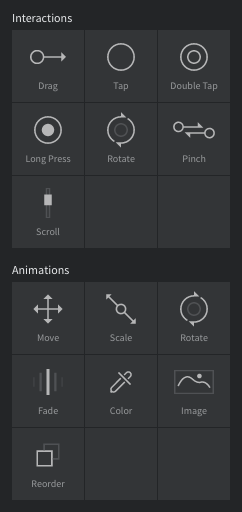
Pixate breaks down the various types of events that can happen on a screen into Interactions, which are triggered by a user (such as a tap or drag), and Animations, which are events triggered by a certain type of interaction. Pixate currently supports these Interactions and Animations:
Move Animations
In our internal app, we wanted some of the screen elements to move when other elements are tapped or dragged.
I can do this in Pixate by adding a move animation to an asset and specifying which interaction I want to trigger the animation. In the demo case, I’ve set up the word “Pointless” in the logo to move when the bear is dragged. I can specify all sorts of fun details like how I want the move animation to look, how long it should take, and where it should end up. The settings look roughly like this:
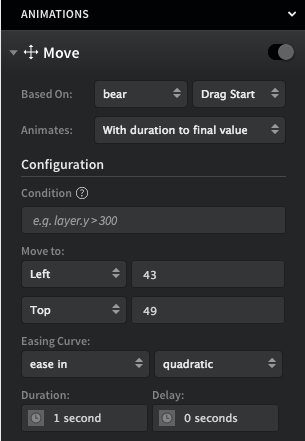
I can then create a similar animation for “Corp.”, and the result looks like this when I drag the bear:
Fade Animations
Some elements in our app appear or disappear when other elements move around them. I can visualize this action using fade animations. The Pointless demo feels monochromatic, so let's say I want to add a pop of color to make it a bit more visually interesting. I set this up by adding a fade out animation to the monochrome logos, and fade in animation to the full color logos when the bear is tapped.
Here’s what the settings in Pixate look like:
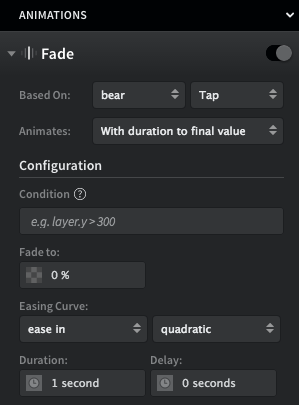
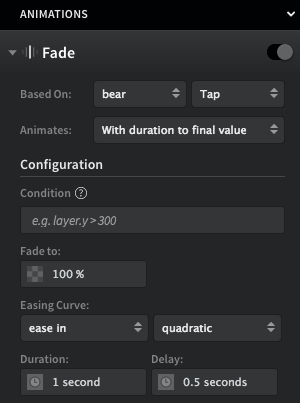
This tells Pixate that when the bear is tapped, the monochrome logo should fade to 0% opacity. The fade animation will take 1 second. Then, I want the colored logo to appear, so I’ll have it start animating 0.5 seconds after the bear is tapped, and “fade” to 100% opacity:
Now, I have a smooth fade out/fade in action when the bear is tapped. Fun!

Scale Animations
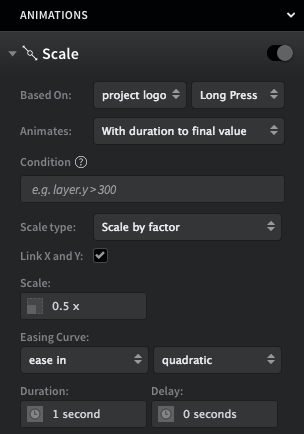
Another important feature of our internal app is allowing users to see more details for specific elements, which we want to handle by increasing the size of that element. Using scale animations in Pixate, I can increase or decrease the size of any asset on the page.
Let’s say I’m feeling a bit overwhelmed by all the large logos on the Pointless page and want to shrink them down. I can do this by combining all the logos into one layer and shrinking them when I long press that layer:
The end result is something like this:

Looks a bit weird, but now I’ve got a bunch of space to work with!
Combining Animations
The real magic happens when you combine different types of animations. Say I want to reveal more info about one of our Pointless projects with some slick animations. I could do this by moving and shrinking the other logos, and fading in some additional info about the project.
Check it out!

Some "Gotchas"
While I found Pixate to be pretty intuitive, there were a couple small issues I ran into when building my prototype:
- I wanted to add a couple different types of interactions to one of my elements. Sometimes Pixate would treat a drag interaction as a tap interaction, so I would accidentally trigger more animations than I wanted when dragging the asset.
- In a previous version of Pixate, the configuration fields for some of the animations included example settings - for example, when setting a fade animation, Pixate displayed "0%" for the opacity setting. A few times, I mistakenly mistook this as a default setting rather than a suggestion, so was confused when the asset didn't actually fade. Each setting needs to be manually input.
- Rookie mistake: Pixate sets a grey background for each layer by default, so my transparent PNGs were showing up as sad grey blocks for a while. This is adjusted easily by clicking the color swatch next to the file name of the layer, or by creating the layer by dragging an asset directly to the canvas.

This is just the beginning of what you can do with a prototyping tool like Pixate. I’ve definitely found it helpful in creating something quickly and easily (and without bothering one of our front-end developers!) so the team can move forward. Here's a bit more about Viget's philosophy on prototyping and creating prototypes with Omnigraffle.
I’d love to hear what projects you think Pixate would help with and other tools that have helped you on past projects!