Manage Common Design Elements using Photoshop Variables
Mark Steinruck, Former User Experience Designer
Article Category:
Posted on
In the past I wrote about a method of linking files to a single smart object. As hard as I tried to make it work, this method never gained traction in my day-to-day workflow because it felt messy and unintuitive.
I dropped the whole idea for a while until a recent project came up that required multiple designers to be working from a large number of files. All of the files shared the same header and footer, and the client continued to make changes to those pieces. Making these types of changes and updating every file is tedious and time consuming. So I started to explore variables in Photoshop.
I’ll say up front that this isn’t the perfect solution to the problem. That would be a common library like the one in Fireworks (hint, hint Adobe). But variables have been around in Photoshop for a long time, which makes them a better, less hacky solution than installing a third-party panel.
Variables in applications like Illustrator, Photoshop, and InDesign are traditionally used for batch processing. For example, if you want to create a business card for multiple people, variables make it simple by just updating a text file with the information and running a script to output the files. For the purposes of this example, I’ll focus on using variables for pixel replacement of common page elements.
Step 1: Define Variables
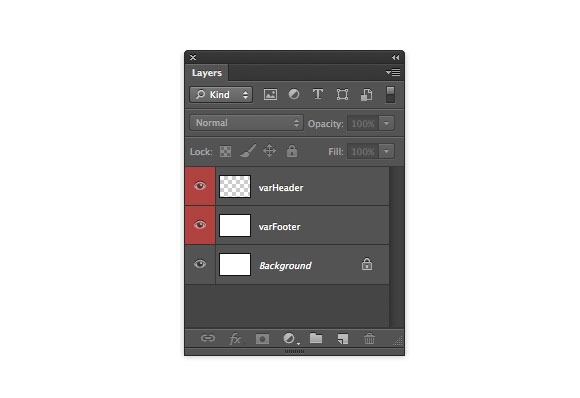
Create layers with the variable names. If you’re working on a team, it might be helpful to name the layer something like “varHeader” and label it with a color so that others know that the file uses variables.
Go to Images > Variables > Define. Now select the layer that is named varHeader in the dropdown, click the Pixel Replacement checkbox, and give the variable a relevant name. I like to use the method “As Is” so that the imported file isn’t resized. The imported file is aligned relative to the boundaries of the file in which it is placed. In the case of a header, I like to pick the top left corner of the grid so that my header file will always align correctly.
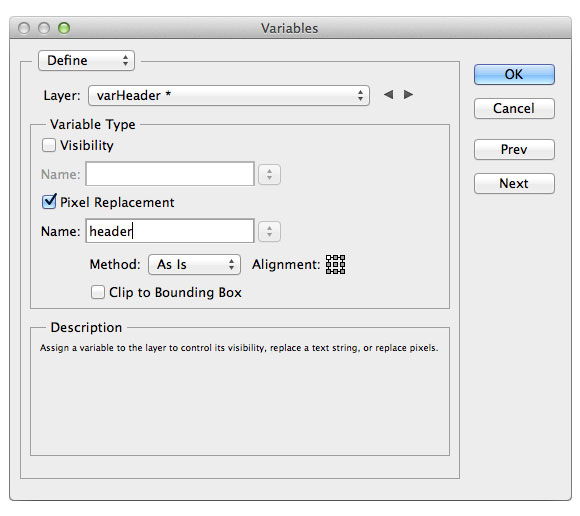
Click the Next button.
Step 2: Create Data Sets
Data sets are simply groups of data presented in tabular form. To create a data set, click the small hard drive icon with an arrow pointing to it. Give the data set a name that anyone will understand. In the Variables box, make sure that header is selected and set the Value by selecting the file that you want to import. You can then see the variable name, file name, and the layer that they're associated with below.
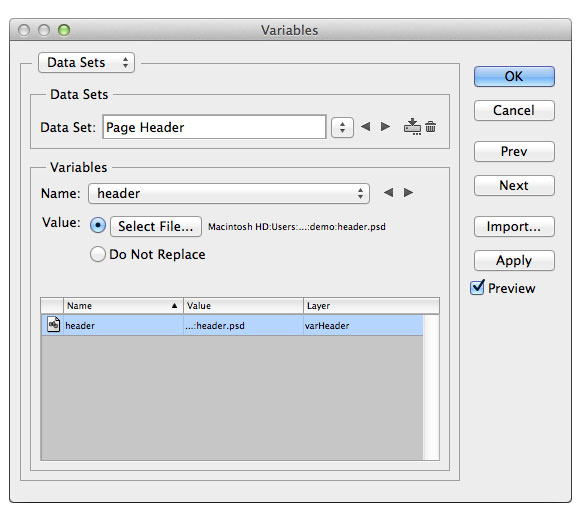
Click Apply, then click OK.
That’s it! You’re first variable is linked to an external file. Replicate the process to link additional variables to their associated files.
Step 3: Apply Data Set
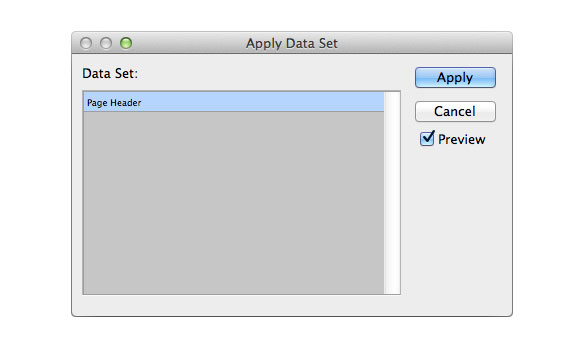
The whole point of this is the ability to update your designs easily when changes are made to the external/imported files. Simply open the design file and go to Image > Apply Data Set. Select the data set to update and click Apply.
Tips & Tricks
Duplicating Templates
Create a base template file that can be duplicated to start each page design. The duplicated file will maintain the variables and data sets so that there’s no need to set them up each time.
Importing Data Sets
If you don’t set up a template file, you can also import the data sets by creating a comma delimited text file with all of the data in it. The problem here is that you still need to set up all of the variables as described in Step 1. Importing data sets is more useful when you have large sets of data, like the business card example mentioned earlier.
Using Smart Objects + Variables
Let’s say that you have multiple design comps within a single PSD. It’s likely that the footer for each design will shift position depending on the page length. Remember that when you update a variable layer, it’s positioned relative to the file in which it’s being placed, and the point that you select on the grid when setting up the variable.
To avoid the hassle of repositioning the footer and/or making multiple updates to each instance of the footer, convert it into a Smart Object. Make duplicate instances of the Smart Object by selecting New Smart Object via copy in the contextual menu. Now set up the variables within the Smart Object just like you did in the example above. If you make changes to the imported footer file, apply the data set in the Smart Object. It will automatically update every instance of that Smart Object in your comp. (Props to Mindy for figuring out that mind-bending trick.)
Breaking It Down
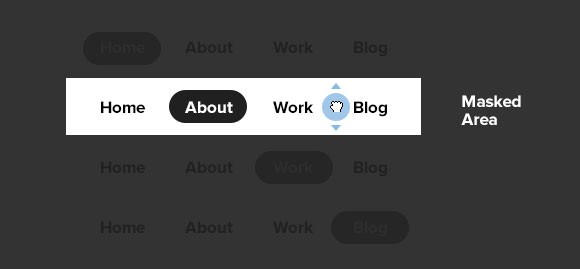
You might have a navigation which would show different selected states based on the comp that you’re importing it into. Separate the navigation into it's own file and import it as it's own variable. Within the imported navigation file, create all states of the navigation like you would in a sprite. When the file is imported, add a mask to the navigation layer so that you can just slide the navigation to the correct state based on the comp.
Q&A
What if I move the location of the imported file on my hard drive?
Applying the data sets, which is the whole point of this, won’t work unless you relink the variables to the new file location as shown in Step 2. However, it won’t change the display in the design. So you can still send the comp to someone and the header and footer files will still appear correctly.
Will this bloat my file size?
Quite the opposite. While the external file maintains its layers in the external/imported, it appears as a flattened file in the comp. Instead of bloating the file size, it actually reduces it. As an added benefit, you also have a folder of page parts already separated into individual files for the developer which may save them time in some cases.
Does it work on Dropbox and Google Drive?
Yes, absolutely. It’s actually easier if multiple designers are working on a project because the imported files can stay in one location.
Have additional questions? Post a comment and I'll do my best to help you work through it.