How to Run Quick, Cheap, Usability Tests Using Mechanical Turk
Todd Moy, Former Senior User Experience Designer
Article Categories:
Posted on
On a recent project, I wanted to quickly evaluate multiple navigation concepts for a site. Setting up the tests in Treejack was easy enough, but I was faced with the usual problem of quickly getting an ample number of participants.
In this situation, we weren't able to intercept site visitors with Ethnio, nor did we have access to lists of users from which to recruit. Budget was tight, so using a recruiting service was out of the question. Normally in this situation, I'd reach out to friends and family, but getting enough participants in a short timeframe wasn't feasible.
Then I remembered Amazon Mechanical Turk.
Amazon Mechanical Turk—or MTurk to the hip kids—provides a marketplace that lets you find people willing to complete online tasks for you. The types of tasks run the gamut from audio transcription to sentiment analysis. Linking out to external surveys was the option that exactly fit my needs.
Using MTurk, I was able to get my quota of participants in just a few hours for about the cost of a round of beers. Here's how I did it.
Starting a Project
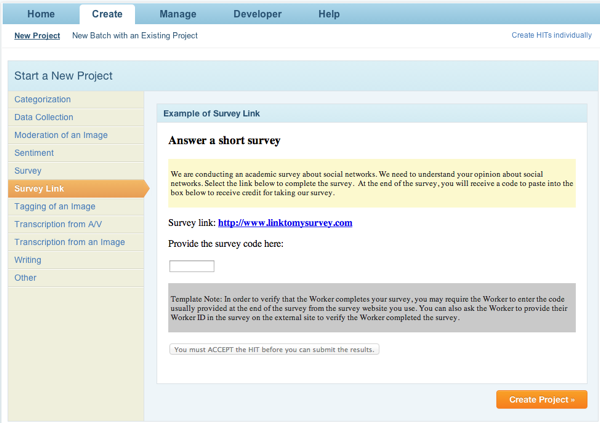
You'll most likely have a project for every unique test you run. Projects contain test properties such as the workers authorized to take the test and the instructions they see. Once created, Projects are executed as Batches. We'll cover that bit later.
From the Create screen, there are a few project templates to choose from. You'll probably be using a third party testing service like Usabilla or Optimal Workshop, so you'll want to choose Survey Link.
On the next screen, you'll enter in the basic information about your project. Most of the fields are self explanatory, but a few are a bit unusual:
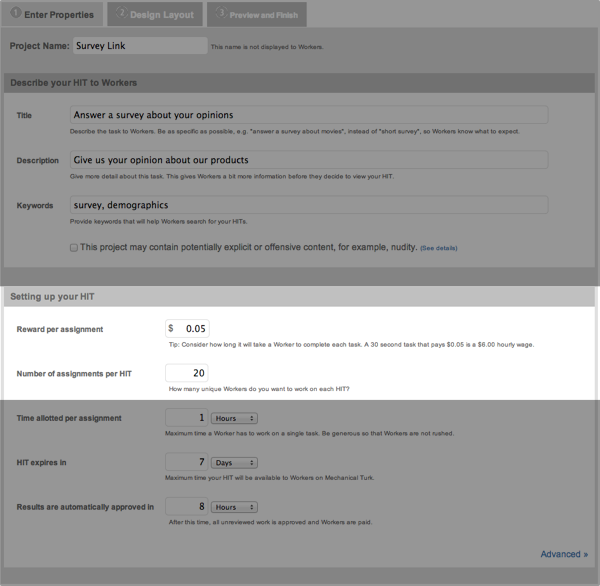
- Reward per assignment: This is the amount you'll pay each worker. You can choose how much to pay, but bear in mind that being stingy usually nets you poorer quality results. I usually pay between $8.00 and $9.00 an hour, which for a five minute test equates to a $0.65 - $0.75 reward. Note that each person is paid the same amount regardless of how long he or she takes.
- Number of assignments per HIT: This is the number of people you want to test before the batch shuts down automatically. Multiply this number by your your reward to determine how much you'll be paying.
Refining the Test Population
MTurk only provides a few ways to screen participants, all of which are accessed from the Advanced > Worker Requirements menu. To help guard against English comprehension issues, I allow only Master Workers from the United States.
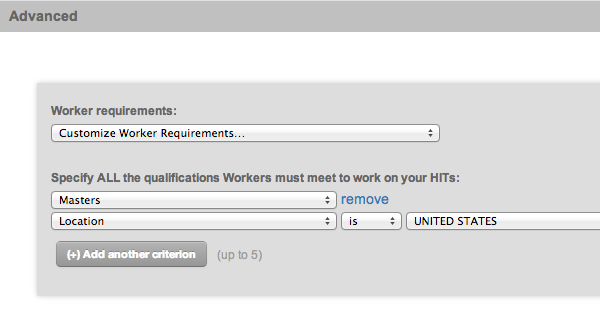
Master Workers, by the way, are those people that have demonstrated a history of completing tasks accurately and successfully. I find I'm more likely to get quality results with them. When allowing only Masters, you'll want to start your reward in the $7.00+/hr range since they're a limited quantity.
Design the Layout
Workers receive their instructions and complete their tasks within the MTurk interface. So, it's very important that you make their experience as usable as possible.
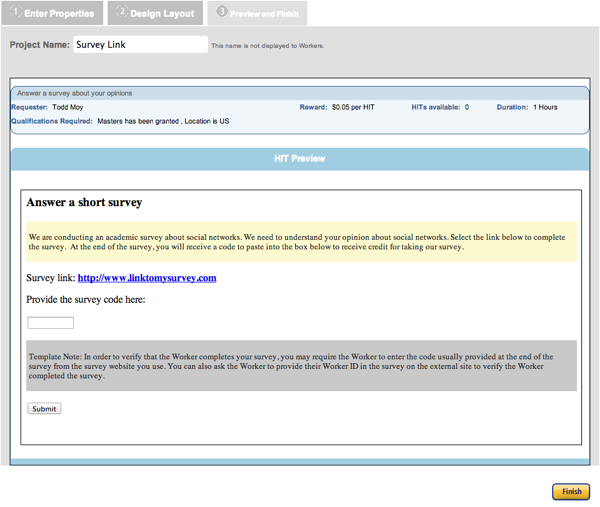
The first thing you want to focus on is the Frame Height. The testing tool you've chosen will load in an iframe of this height. By adjusting this value, you can minimize the amount of in-page scrolling that workers need to do. As you change this value, you can preview your results on the next tab. I usually bounce back and forth between these tabs until I'm happy with the results.
Below this, you can edit the instructions. Here, I'd encourage you to limit your changes to copy. Typographic and layout changes are likely to introduce problems for workers and, frankly, aesthetics don't matter much here.
You'll also want to update the hyperlink to point to your test. Bizarrely, the WYSIWYG editor does not have a "Edit Link" button so you'll need to jump into the source to make this change.
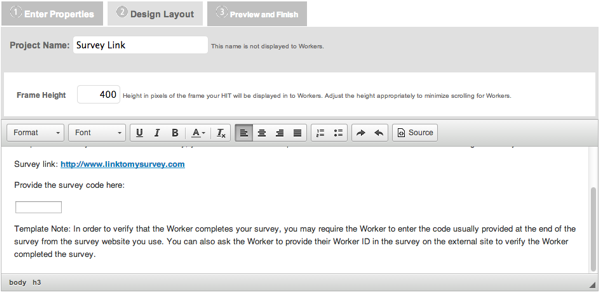
One thing to note: MTurk requires an input field on this screen to let you capture additional data from the worker. If you delete it, the system offers up a vague protest when you try to save your edits. So, I leave it as-is and adjust the copy to instruct the worker to write "done" when they are done. Kludgy, but this approach has never given me any issues.
Once you're done, preview your work and click "Finish".
Run Your Test
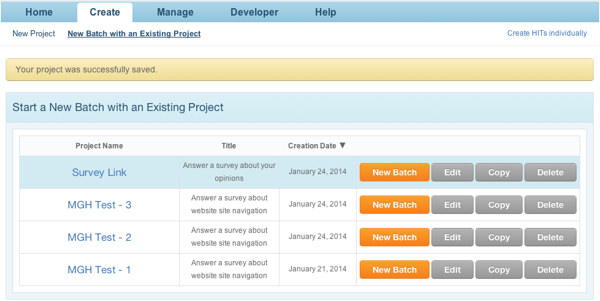
So you've created a test environment and now you're ready to run your test. In MTurk's language, you'll want to create a new Batch. To do so, go to the Create tab, find the Project you just created, and click New Batch.
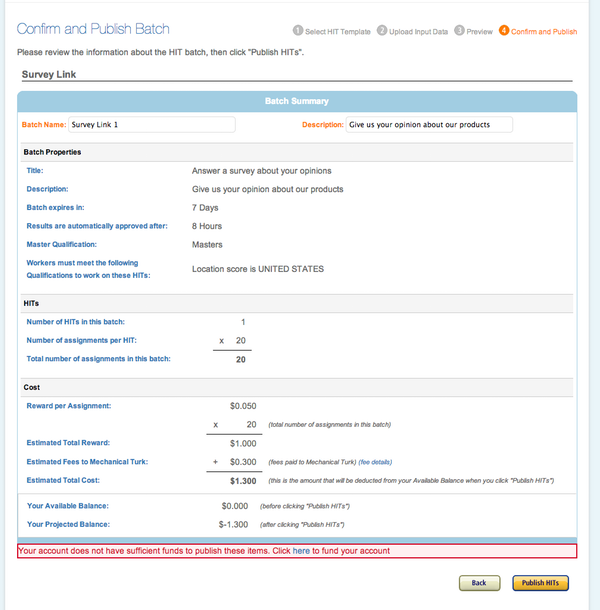
Here, you can review your screen and settings to make sure everything's copacetic. Most likely, you'll need to add funds to your account to pay for the test. MTurk provides you with a itemized breakdown of costs so you can add in the proper amount.
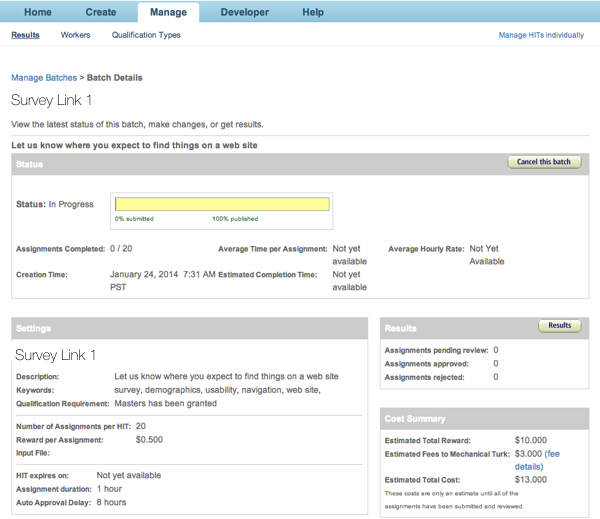
Once you've paid for your test and clicked Publish HITs, sit back and wait for the results to come in. In my experience, it usually takes about a day to get 20 responses, though this will certainly vary depending on your test, reward, and worker requirements. By default, your workers are automatically paid for completing assignments so you don't need to approve their work.
Parting Thoughts
That's pretty much all there is to it. Provided you're not too picky about your test participants, you can get quick and cheap results without a lot of hassle.
For me, however, the efficiency gain translates directly into being able to test early and frequently. In the test that drove me to use MTurk, I found that the most unconventional and riskiest concept trounced the more tried-and-true options. Without this evidence, I probably would have shelved it early on. But being able to get a quick gut-check gave me the confidence to consider this wild alternative more seriously.