How To: Make The Viget Inspire Author Thumbnails
Doug Avery, Former Senior Developer
Article Category:
Posted on
Since Viget Inspire blog launched, I've received a lot of questions about the little user thumbnails we made for the Viget designers. Is it just a Photoshop filter we slap on carelessly? Are they painstakingly drawn by hand and watercolored over a period of several hours? The answer is (unfortunately), neither as cool as hand-drawing or as easy as a filter, but we've got it down to a pretty streamlined process at this point. Like the background "how to" post from last month, this tutorial has a lot of of textures and hues, manipulated and blended in the layers palette.
Begin With a Photo
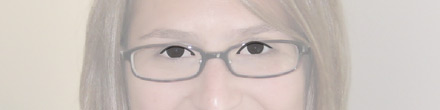
The team agreed that Samantha's old picture didn't turn out as well as it could've, so I'm going to remake hers and walk you through the process. We begin by getting a different photo of Sam for the new thumbnail, and taking it right into Illustrator.

The photo in question...let's take it into Illustrator.
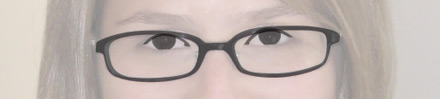
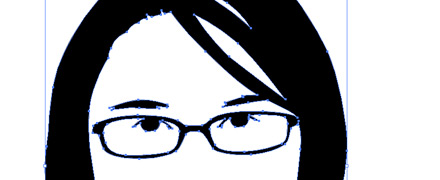
When you're doing a trace like this, you want to plan out what types of lines and objects you'll be tracing before you begin. With the Viget Inspire pictures, I decided to go with hair, glasses, eyebrows and eyes as the main shapes, and to fill in the rest of the pictures with pieces from the actual photo (more on that later). So first, we're going to trace her eyes, very simply, with the pen tool.
That designer's got devil eyes!
Keeping our shapes and the photo at 50% opacity makes tracing a lot easier.
The hair in this photo makes a fun shape, which was part of the criteria for choosing it.

Even though eyebrows can be thick (shape-wise), in reality they're lighter than hair and eyes. To keep them from looking crazy-big and dominating the face, shrink them a little bit vertically.

With long hair, I like to put in a few comic-style shines.
To add some face definition, let's trace in the jawline a tiny bit.
Now that we have all our shapes, we want to merge them into one using tools in the Pathfinder palette. "Add To Shape Area" to combine the black ones, and use "Subtract From Shape Area" to punch the the whites shapes as holes into the black area. Now we have one black shape.
Time to head over to Photoshop.
The Return of an Old Friend
We're going to grab the same watercolor texture used in the last tutorial and get some more mileage out of it. We're looking for a complex texture with some random, organic shifts in the color, and that image is going to be perfect for our needs.

Just paste Samantha into Photoshop, as a Vector Image, and resize to the appropriate shape. Then, paste the watercolor in a layer above her, and option-click the space between the layers to mask one into the other.
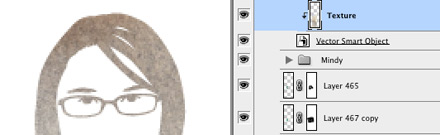
The watercolor is now masked inside our illustration.
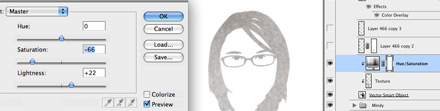
Let's adjust the color by adding a new Adjustment Layer > Hue/Saturation into the mask. Lighten the texture up and turn the saturation down a little.
Okay
This part is mostly just playing around until it feels right. I probably could accomplish this all with fewer layers, but it's nice to have more in place so you can go back and adjust pieces of the image at the end.
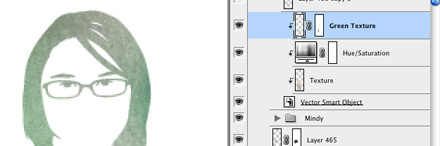
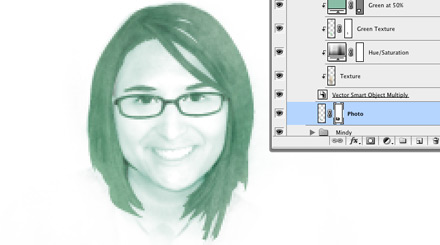
Here, I added in a SECOND piece of the texture, from a green area of the image. Set it to "multiply", and it'll overlap the illustration and mix the color a little bit.
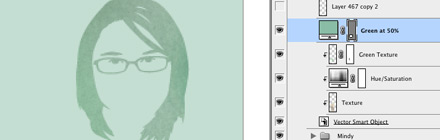
The textures and hues are looking a little extreme, so let's add a 50% opaque layer of green to even everything out.
Adding In The Details
I actually came to this next series of steps during a time crunch. I'd spent a while trying to draw some decent-looking mouths, but couldn't really get them to work. The mouth is a really subtle piece of the face, making especially hard to illustrate in a single dark color, so I thought I'd compromise by ghosting in some features using the original photo.

Start by lining up the photo with the vector illustration.
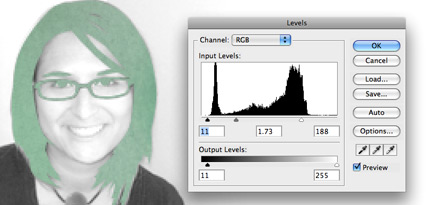
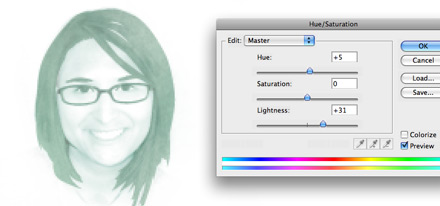
Let's boost the levels to get a strong white point in the cheeks, taking care not to lose too much detail from the mouth.
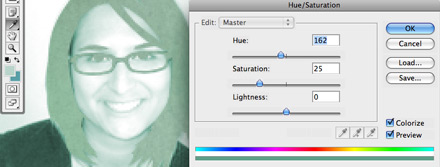
Using Hue/Saturation, tint the photo to a green that's consistent with the hair color.
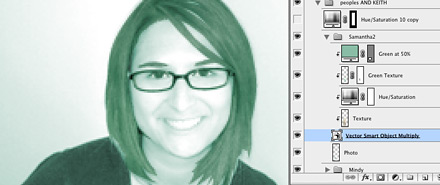
Looks a little flat...so now, blend the two by setting the vector image above to "multiply." Now, some of the hair texture is showing through...perhaps too much.
Put a mask on the photo and paint out unnecessary or muddy colors. This means painting back all the stuff around Samantha, the eye area, the edges where the face meets the hair, and brushing back the hair a little bit.
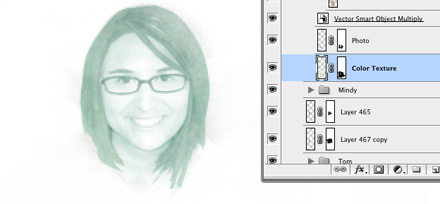
Everything Must Match
At this point, I like to zoom out and look at the thumbnail next to the other ones I've made. Is it too light? Too green, too blue? A few adjustments will fix it.
Adding another adjustment layer above the image allows us to tint and lighten it, so it'll fit in next to the other thumbnails.
The Finishing Touch
I like to add a bit of "bleed" to all the watercolor images, just to give them another interesting texture. This just means reusing the watercolor graphic in a random way behind the image.
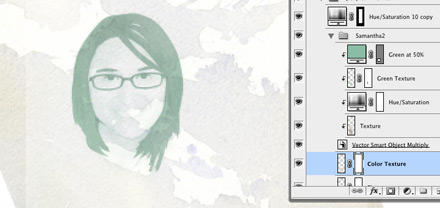
Just put the image behind Samantha...
...give it a tint, and paint out most of it to add a subtle texture around the outside of the hair.
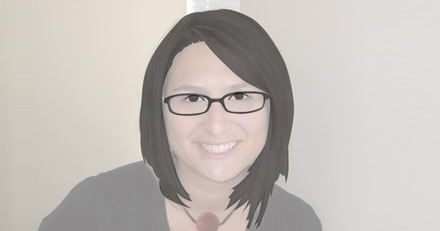
Since we produce these images at final size, the versions in the post were a little blurry and zoomed-in. Here's the real final image:

In the end, it's not so much of a fixed technique as it is establishing a goal and sort of wandering towards it, always using layers and effects that you can turn off or tweak later on. I'm still learning the best way to do these, (and I might redo a few more of them in the near future), so if you have any tips or know of any similar techniques, post'em in the comments.