Building a Javascript Game with EaselJS and Box2D: Part 1
Tommy Marshall, Former Front-End Developer
Article Category:
Posted on
Ever since we made Say Viget! we've had a bunch of people asking us to explain exactly how we did it. This post is a first go at that explanation -- and a long one at that. Because so much goes into making a game, this is Part 1 of a multi-part series on how to build a 2D Javascript game, explaining some theory, best practices, and highlighting some helpful libraries.
If you're reading this then you probably know the basics: we use Javascript to add things to the context of a canvas while moving those things around through a loop (which is hopefully firing at ~60fps). But how do you achieve collisions, gravity, and general gameplay-smoothness? That's what this post will cover.
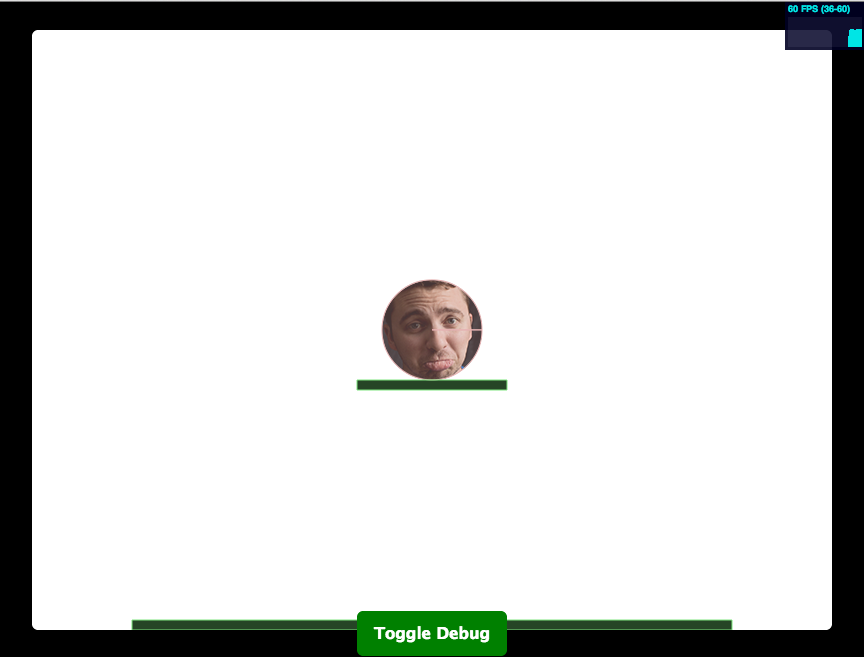
View Demo | Code on Github |
Take note: I set up a few gulp tasks to make editing and playing with the code simple. It uses Browserify to manage dependencies and coded in Coffeescript. If you're unfamiliar with Gulp or Browserify, I recommend reading this great guide.
Using Box2D and EaselJS
There's a bunch of complex math involved to get a game functioning as we would expect. Even simple things can quickly become complex. For example, when we jump on a concrete sidewalk there is almost no restitution (bounciness) compared to when we jump on a trampoline. A smooth glass surface has less friction than a jagged rock. And still, objects that have a greater mass should push those with lesser mass out of the way. To account for all these scenarios we'll be using the Box2D phyics library.
Box2D is the de facto standard 2D physics engine. To get it working in the browser we'll need to use a Javascript port, which I found here.
Since the syntax for drawing things to a canvas can tend to be verbose, I'll be using a library called EaselJS, which makes working with the <canvas> pretty enjoyable. If you're unfamiliar with EaselJS, definitely check out out this Getting Started guide.
Let's get started.
What's in a Game?
Think high-level. Really high-level. The first thing you realize we need is a kind of world or Reality. Things like gravity, mass, restitution, and friction; these things exist in the real world and we probably want them to exist in our game world, too. Next, we know we will have at least two types of objects in our world: a Hero and some Platforms. We'll also need a place to put our these two objects -- let's call this thing we put them on a a Stage. And, just like the stage for a play, we'll need something that tells our Stage what and where things should be put. For that, we'll create a concept of a Scene. Lastly, we'll pull it all together as into something I'll name Game.
Code Organization
As you can see we start to have clear separation of concerns, with each our Scene, Stage, Hero, etc., all having a different responsibility. To future proof and better organize our project we'll create a separate Class for each:
- Reality - Get our game and debug canvas ready and define our virtual world.
- Stage - Holds and keeps track of what the user can see.
- Hero - Builds our special hero object that can roll and jump around.
- Platform - Builds a platform at a given x, y, width, and height.
- Scene - Calls our hero and creates the platforms.
- Game - Pulls together all our classes. We also put the start/stop and the game loop in here.
Additionally, we'll create two extra files which define some variables being used throughout our project.
- Config - Which holds some sizing and preferences
- Keys - Defines keyboard input codes and their corresponding value.
Getting Started
We'll have two <canvas>s, one that EaselJS will interact with (<canvas id="arcade">; which I'll refer to as Arcade), and another for Box2D (<canvas id="debug"> referred to as Debug). These two canvases run completely independently of eachother, but we allow them to talk to eachother. Our Debug canvas is it's own world, a Box2D world, which is where we define gravity, how objects (bodies) within that world interact, and where we place those things that the user can see.
The objects we can see, like our hero and the platforms, we'll draw to the Arcade canvas using EaselJS. The Box2D objects (or bodies) that represent our hero and platforms will be drawn to the Debug canvas.
Since Box2D defines sizes in meters, we'll need to translate our input into something the browser can understand (Moving a platform over 10 meters doesn't make sense, 300 pixels does). What this means is for every value we pass a Box2D function that accepts say an X and Y coordinate, we'll need to divide by a scale that basically converts those meters into pixels. That magic number is 30. So, if we want our hero to start at 25 pixels from the left of the screen and 475 pixels from the top, we would do:
 scale = 30

# b2Vec2 creates a mathematically vector object,
# which can be a magnitude and direction
position = new box2d.b2Vec2( 25 / scale , 475 / scale)
@body.SetPosition(position)
Simple enough, right? Let's jump into what a Box2D body is and what we can do with it.
Creating a Box2D Body
Many of the objects in the game are made up of something we can see like the color and size of a platform, and world constraints on that object we cannot see, like mass, friction, etc. To handle this, we need to draw the visible representation of a platform to our Arcade canvas, while creating a Box2D body on the Debug canvas.
Box2D objects, or bodies, are made up of a Fixture definition and a Body definition. Fixture's represent what an object, like our Platform, is made up of and how it responds to other objects. Attributes like friction, density, and its shape (Whether it's a circle or polygon) are part of our Platform's Fixture. A Body definition defines where in our world a Platform should be. Some base level code for a Platform to be added to our Debug <canvas> would be:
scale = 30 width = 50 height = 50 # Creates what the shape is @fixtureDef = new box2d.b2FixtureDef @fixtureDef.friction = 0.5 @fixtureDef.restitution = 0.25 # Slightly bouncing @fixtureDef.shape = new box2d.b2PolygonShape @fixtureDef.shape.SetAsBox( width / 2 / scale, height / 2 / scale ) # Note: SetAsBox Expects values to be # half the size, hence dividing by 2 # Where the shape should be @bodyDef = new box2d.b2BodyDef @bodyDef.type = box2d.b2Body.b2_staticBody @bodyDef.position.Set(width / scale, height / scale) # Add to world @body = world.CreateBody( @bodyDef ) @body.CreateFixture( @fixtureDef )
Note that static body types (as defined above with box2d.b2Body.b2_staticBody) are not effected by gravity. Dynamic body types, like our hero, will respond to gravity.
Adding EaselJS
In the same place we created our Box2D fixture and body definitions we can create a new EaselJS Shape which simply builds a rectangle with the same dimensions as our Box2D body and add it to our EaselJS Stage.
 # ...from above...
# Add to world
@body = world.CreateBody( @bodyDef )
@body.CreateFixture( @fixtureDef )

@view = new createjs.Shape
@view.graphics.beginFill('#000').drawRect(100, 100, width, height)

Stage.addChild @view
From there, we now have one EaselJS Shape, or View, which is being drawn to our Arcade canvas, while the body that represents that Shape is drawn to our Debug canvas. In the case of our hero we want to move our EaselJS shape with its corresponding Box2D body. To do that, we would do something like:
 # Get the current position of the body
position = @body.GetPosition()
# Multiply by our scale
@view.x = position.x * scale
@view.y = position.y * scale
The trick to all of this is tying these two objects together -- our Box2D body on our Debug canvas is effected by gravity and thus moves around. When it moves around, we get the position of the body and assign update the position of our EaselJS Shape or @view. That's it.
Accounting for User Input and Controls
Think about how you normally control a character in a video game. You move the joystick up and the player moves forward... and keeps moving forward until you let go. We want to mimic that functionality in our game. To do this we will set a `moving` variable to true when the user pressed down on a key (onKeyDown) and set it to false what the user lets go (onKeyUp). Something like:
 assignControls: =>
 document.onkeydown = @handleDown
 document.onkeyup = @handleUp

handleDown: (e) =>
 switch e.which
 when 37 # Left arrow
 @moving_left = true
 when 39 # right arrow
 @moving_right = true

handleUp: (e) =>
 switch e.which
 when 37
 @moving_left = false
 when 39
 @moving_right = false
And on each iteration of our loop, we would do something like:
 update: =>
 # Move right
 if @moving_right
 @hero_speed += 1
 # Move left
 else if @moving_left
 @hero_speed -= 1
 # Come to a stop
 else
 @hero_speed = 0
Again, this is a pretty simple concept.
Look Through The Code
From here I recommending looking through the code on Github for great justice. In it you'll find more refined examples, in an actual game context, which will provide for a fuller understanding of the concepts explained above.
Conclusion
So far we've covered:
- Using two canvases, one to handle drawing and the other to handle physics
- What makes up a Box2D body
- How to tie our EaselJS objects to our Box2D bodies
- A strategy for controlling our hero with user input.
In Part 2 we'll cover:
- How to follow our hero throughout our scene
- How to build complex shapes
- Handling collisions with special objects.
In addition to what I'll be covering in Part 2, is there anything else you would like covered relating to game development? Have questions or feedback on how we could be doing something differently? Let me know in the comments below.