Make Apple’s Addressbook Pull from Exchange
Tony Pitale, Former Viget
Article Category:
Posted on
On a Mac, access to the features of Exchange available to Windows users, is difficult contortion. Access to email and the global address list is dependent on the server’s configuration. However, given the right settings it is easy to configure Mail to access your exchange email, even on hosted solutions. However, getting access to the global address list is not quite so obvious. The trick is in Address Book. Here is a walkthrough of the settings I use. Almost every configuration is different so, leave comments and I will try and guide anyone through their settings.
First, obviously, open Address Book. Open preference (cmd-comma). Select the LDAP tab. Next, click the plus button in the bottom left corner of the window.
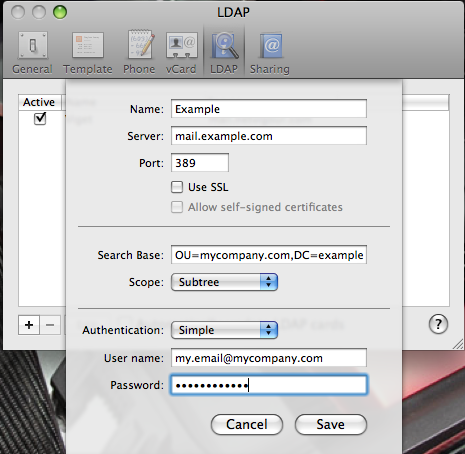
Now, in the drop-down, enter an arbitrary name (I used Viget). The server I use is the same one I use to access my email through Outlook web access. The default port worked for me, without SSL.
I’ll skip search base for the moment as it is the most complicated of the settings and go right to authentication. More than likely you will have to use some authentication. The only option is simple. The user name is very likely your full email address and the password to match. If you are currently using Outlook web access, these should be fairly obvious.
Lastly, the search base and scope. The global address list is based on active directory. Active directory organizes its structure with a variety of two-letter keys. The most common are OU (for organizational unit, I think) and DC. DC is very likely going to be the domain name used in Outlook web access (e.g., example.com). OU may be the domain name attached to your email but, this field varies greatly from company to company. The format of this line is “OU=example.com,OU=Customers,DC=domain,DC=com” Lastly, scope, in all probability will be subtree.

As I said earlier, all of these settings are fairly vague (unless, you happen to be the administrator who configured the exchange server). Each setting may require some alterations as even the slightest mistake can lead to unexpected results, or no results at all.
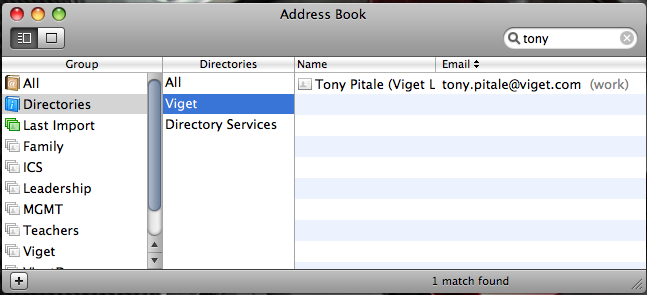
To finish, click save and close preferences. In the left column of the address book should be a Group “Directories”. This is where your new ldap directory will be located. Click the name you supplied for your new directory. Don’t be alarmed when there are no listings shown. You are required to provide a search in order to get any results from the exchange server. So, try searching in the top right and see if your own name is returned.

Good luck