An Engineering Design Process
Justin Sinichko, Former Hardware Developer
Article Category:
Posted on
Our recent explorations into the world of connected hardware have taught us a lot about the engineering design process. Namely, engineering design is not a linear path, but a highly creative and dynamic process characterized by problem definition, rapid iterations, and working solutions. I’d like to take some time to touch on this process by illustrating its nuances within the context of a novel internal project: The Whiteboard Cleaner Bot.
Whiteboard cleaning prototype: An internal propeller pushes a rotating cleaning head into the whiteboard.
I’ve broken down our engineering design process into five steps:
- Identify the problem
- Research the problem
- Brainstorm and choose a promising solution
- Prototype the solution
- Evaluate and improve the prototype.
Let’s explore each step in greater detail, using the Whiteboard Cleaner Bot as our example.
Step 1 - Identify the Problem
As obvious as it may sound, every solution begins by clearly defining the problem/challenge. To flesh this out, we ask questions such as: What problem needs solving? Who is it for? Is there a budget? How about a timeline? Will it need to operate underwater or in space?
Example: We realized we had an itch -- dirty whiteboards. We wanted an automatic solution that would be as simple as a light switch. Cost was a constraint. It needed to be cheap. For us, a successful win would look something like a clean whiteboard.
Step 2 - Research the Problem
The second step involves relevant self-education. Do off-the-shelf solutions already exist? Can aspects of existing solutions be improved upon? Do similar solutions or useful technologies exist in adjacent markets? How much pain does the problem cause, and how strongly is a solution needed?
Example: Our research uncovered a number of autonomous cleaning solutions. There are window cleaning robots that climb skyscrapers with suction cups. There are robots that clean massive solar arrays in the solar photovoltaics industry. But, in the automatic whiteboard cleaning space, there are very few players. Maybe this is because the pain is too minimal, or the cost is too high.
Step 3 - Brainstorm and Choose a Promising Solution
The third step involves everyone. Gather a team around a whiteboard, use post-it notes, throw caution to the wind, and brainstorm potential solutions. Temper ideas against design constraints. Compare the best ideas. Finally, select which idea you will prototype.
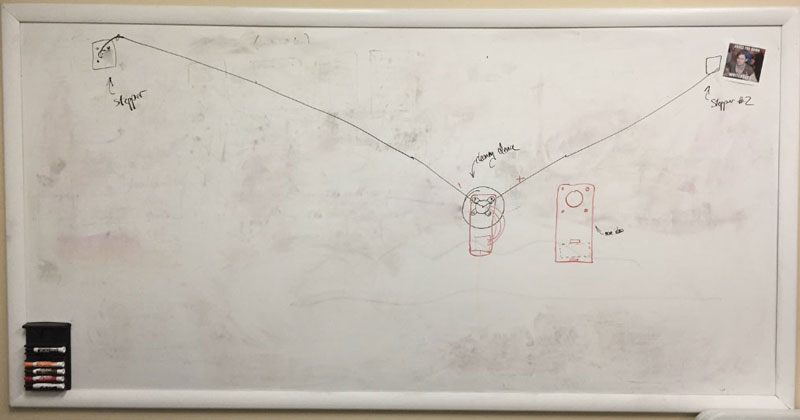
Example: We gravitated towards a solution that was fairly out of the box but which also felt promising. We’re constantly on the lookout for interesting engineering challenges and this met the bill. Our design involved a cleaning vehicle suspended by fishing line. Stepper motors at the end of the fishing line coordinated the movement of the cleaning vehicle.
Step 4 - Prototype the Solution
Prototypes are functioning versions of the solution. The early versions are rough and unpolished; but, they help to quickly verify a design by identifying its strengths and weaknesses. Often, they are built to test critical functions. But, not every prototype will test every aspect of a solution. In some cases, prototypes require incremental progress, a small change with each iteration. In this way, they continually evolve.
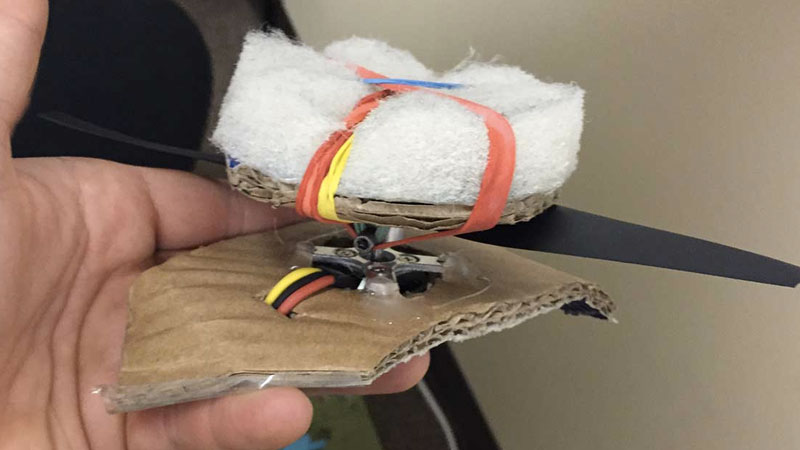
Examples: Our first prototype of the Whiteboard Cleaner was built from low-cost RC components and cardboard. Our intention was to quickly validate our design approach for the cleaning mechanism.
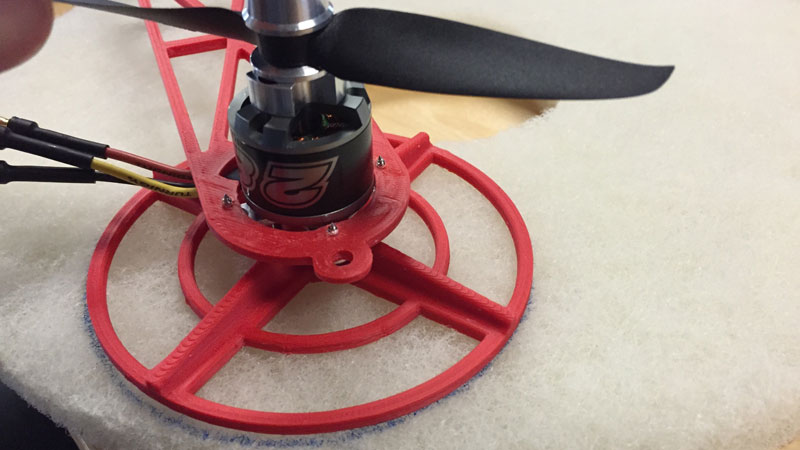
In our second iteration we leveraged RC components and a 3D printed chassis. This enabled the first complete test of our solution.
Step 5 - Evaluate and Improve the Prototype
Thinking of the prototype as part of the working solution is valuable because you leave room for critique and improvement in future iterations. Be open to complications that challenge your idea and make it better. Once the initial prototype is tested, get everyone together to think critically. Did it solve the problem you originally identified? What worked well? What didn’t work at all? Perhaps there are many areas for improvement.
Examples: We noticed that our design would wobble uncontrollably without additional points of contact. During one test, the entire prototype dropped to the ground and broke -- only the strongest parts of the cleaning vehicle survived. Though the drop test was unexpected, it led us to reinforce and reorient the cleaning vehicle. The result was a stronger and more stable prototype.
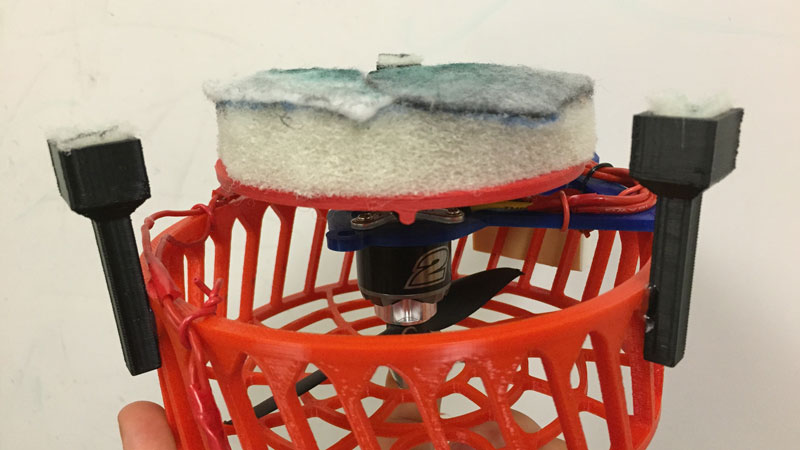
Supports added during testing pictured above (in black).
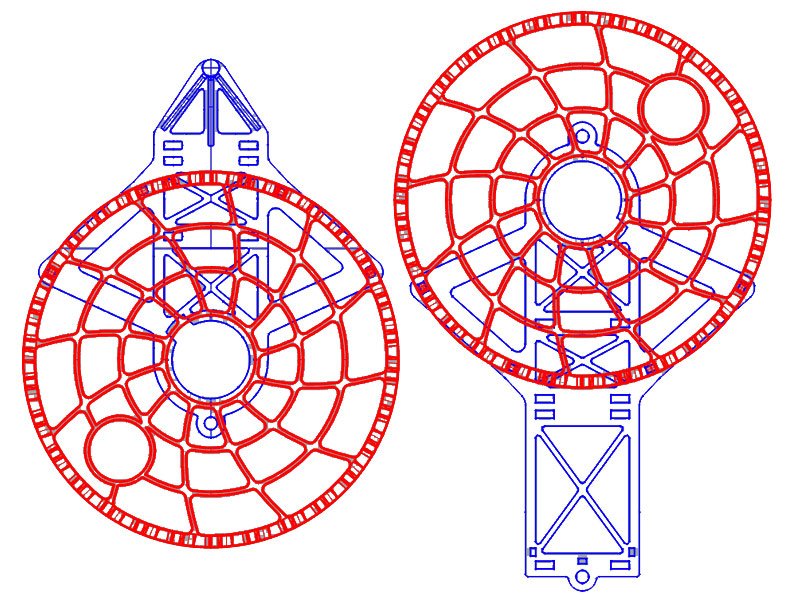
Reinforced/reoriented design pictured left. Original design pictured right.
Conclusion
We were excited with the progress we had made on the Whiteboard Cleaning Bot. And, while it worked, it was not the lean mean cleaning machine we had hoped for. However, it was a wonderful engineering challenge and we thoroughly appreciated the process that guided us along the way.
Please feel free to ask any questions about the Whiteboard Cleaning Bot, or our process, in the comments below.
The completed Whiteboard Cleaning Bot. A microcontroller and IR detector receive instructions and control the rotating cleaning element.